Sorry about not blogging this earlier, but I forgot to, but yes I have completed the test tube models and here is the look of the test tubes:

The final render looks amazing in my opinion and I am proud of the result.
Sorry about not blogging this earlier, but I forgot to, but yes I have completed the test tube models and here is the look of the test tubes:
The final render looks amazing in my opinion and I am proud of the result.
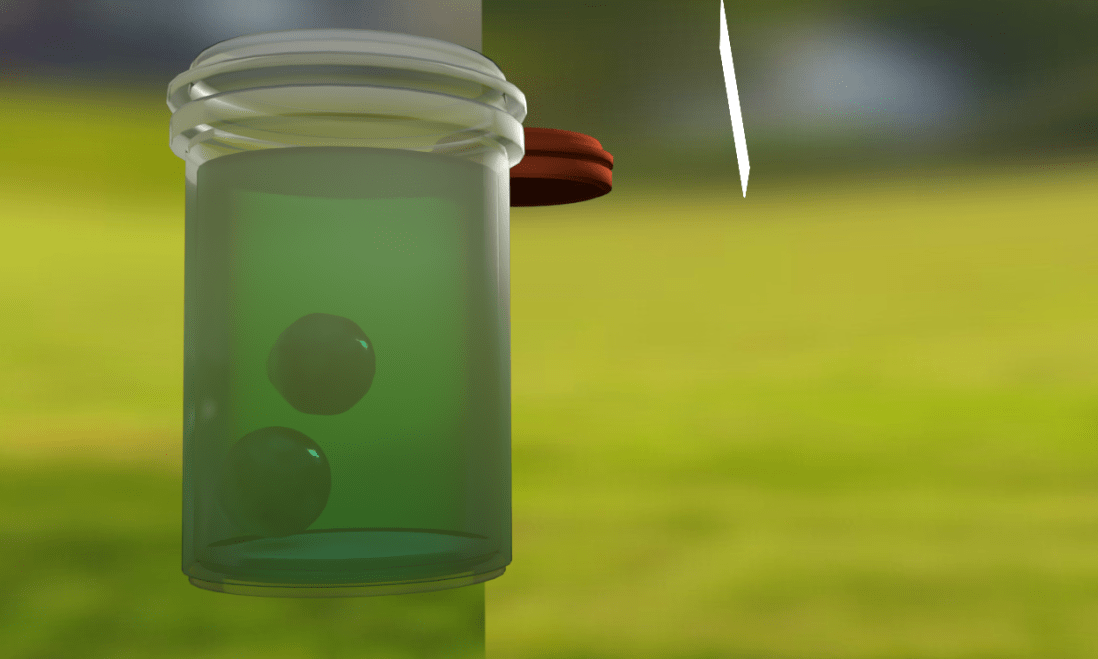
I have been on my way starting the 2nd model and updating the look of it to make it look as good as possible. I have made quite a lot of progress on this model, which is of a jar of eyes, but have not finished it yet and once I have, I will be tuning it to make it look even better and then it will be done.
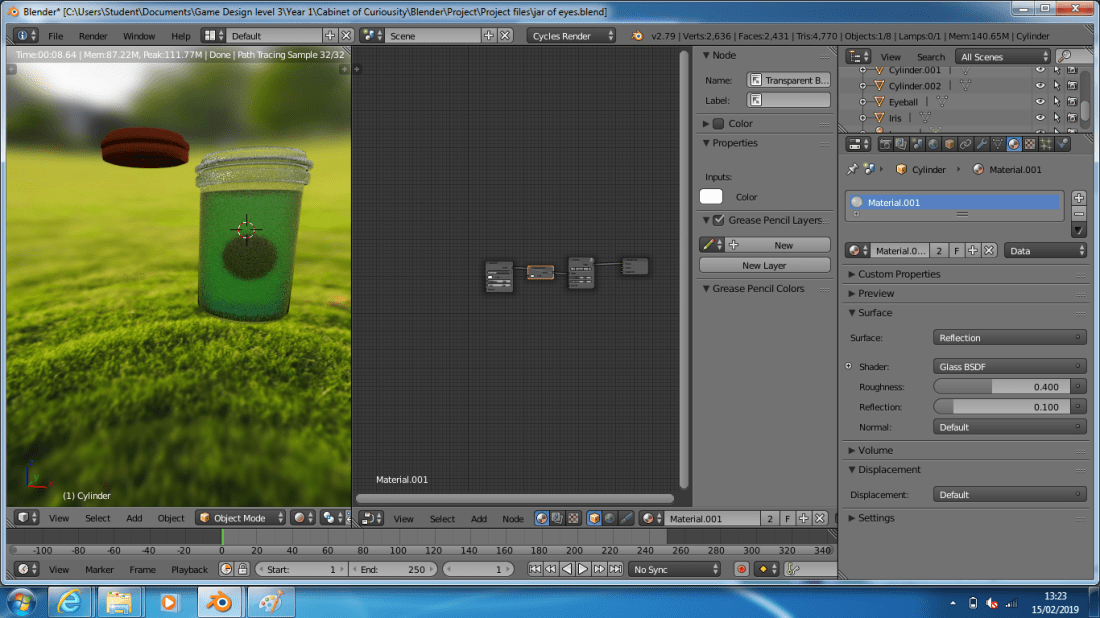
As you can see in the screenshot above the eyeball cannot be seen through the glass, but the iris can.
I don’t know why the eyeball cannot be seen, but I have altered the properties of the glass through some testing and realised a solution to this problem, to add a BSDF Transparent node to the Node Editor and place it before the last node before the output. If I placed it as the final node to the output it will go completely transparent, which might be useful, but I would just remove the object in that case.
Here is the screenshot of it resolved:
 As you can see, it looks better now you can see the whole eyeball.
I have recently went through this tutorial and learned about shape keys further: Tutorial link
I may not use them in this project, but the uses of these are incredible, they seem perfect for animation, but I don’t have much knowledge in that area yet.
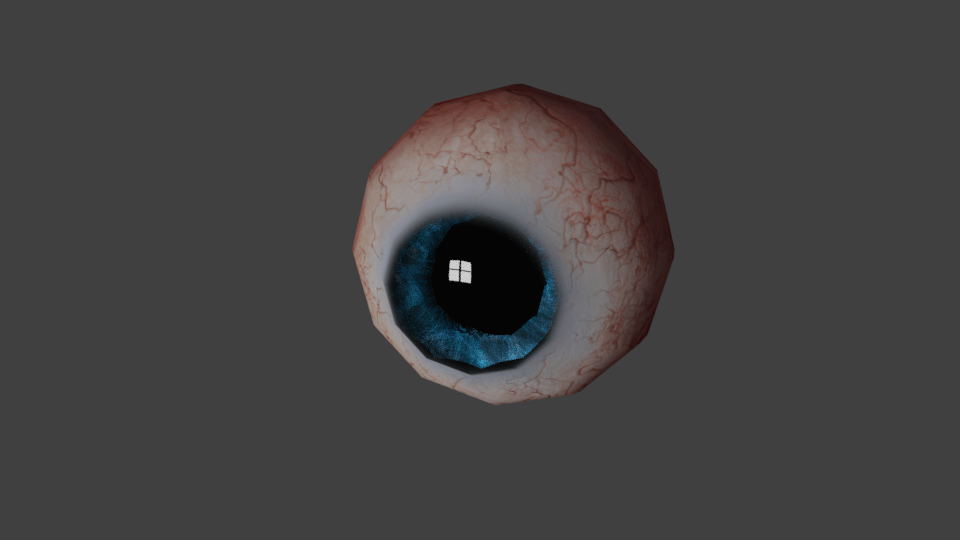
I went through this tutorial: tutorial link and found out how to make a realistic looking eyeball, which I did:
The images I used to make this was all given to me through this tutorial in the description and if you are thinking of going through this tutorial as well, my suggestion is to reduce the video play speed to either 0.5x or 0.25x, because the guy in the video goes way to fast. The tutorial is also not suitable for beginners.
The first part of the tutorial is the making of the shape, first the eyeball itself, then the iris, a shadow for the eyeball is added in later, but not at this stage. I was able to create the Mesh for the eyeball, but the Mesh for the iris was a bit tricky and I was stuck at this stage for about 20 minutes.
After the shape of the eyeball was done, then came the lighting and that was done in a very peculiar way to me, but was definitely worth the effort put into it.
Once the lighting was done, then came the texturing. The first step was to mark and unwrap the whole eyeball and then open up one of the images given and locate the areas of the eyeball texture to the correct positions, height and rotations. Then finally applying the textures though the texture panel on the property menu on the right.
After this I applied the node setup what was displayed to the Iris and eyeball. This improved the quality of the eyeball tremendously and made me realise even more how important the Node Editor tool is.
The final step of the tutorial was making small adjustments, like pupil size slider and I think adding in the shadow for the eyeball itself. Through this part I learned about shape keys an how important they can be. Shape keys let you record a shape before and after adjustments and use a slider to find the perfect ratio for that object or something along those lines.
I made a small mistake when working with the test tubes, I accidentally attached the camera to an object. I did some problem solving and realised I can change it back by going to the scene property panel and changing the camera to camera.


I went through a tutorial through this YouTube Video: YouTube video. To learn how to create liquid for Blender projects. This wasn’t really needed for this project, but I really wanted to know how to create liquid for future Blender projects and how it worked.
The examples I gave are screenshots of the animation I made, because I didn’t want to pay for premium, because I don’t plan to make profit from this and am just using it for a portfolio to show my progress.
Throughout this tutorial I learned how long it takes to render an animation, why it maybe beneficial to lower the quality by reducing the frame-rate and resolution, the problems that come with tweaking animation, why it is important to get it the best first time and why Blender isn’t great for 3D animation when you have a deadline (because it takes forever to render).
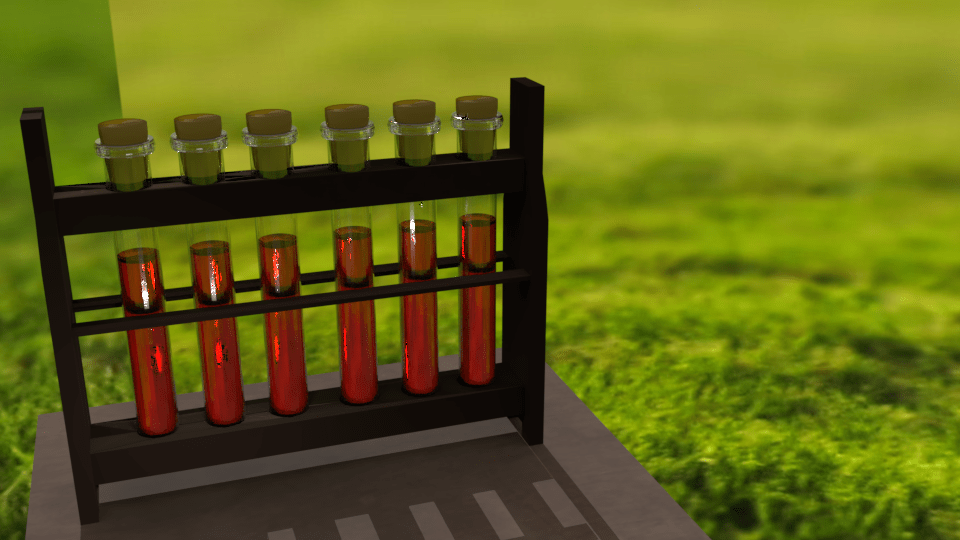
From using the nodes from the previous tutorial I did I was able to improve the look of the test tubes to look more like glass, give the wood more detail and just in general improve the look.
The only things I haven’t changed are the chemicals, the background and the plane to a better plane.
For my first product, the chemical test tubes and test tube rack, I wanted a better way to add wood texture, I found a video and using their nodes went through it.
This tutorial helped me out so much and I can now create realistic looking wood more easily than ever before. I am very thankful for this tutorial, I will be using this node setup for future 3D models. This is the final image, which I also increased the depth of so it looks like it was in the forest:
I have found out how to cut a hole in another shape in Blender using this simple tutorial, Tutorial link –>
This however failed to mention or I overlooked that all modifiers have to be applied already to the shape you are cutting a hole out of, I found this out through trail and error, first trying the other settings, thinking that my situation might be different, which is was, but not like that, I’m embarrassed that it took me so long to figure out, which was about 2 days, but now I can continue my progress.
These are 2 screenshots of without and with holes in to show you the difference it makes.


