3D Modelling Sketches

The first item I chosen to sketch was a simple one of test tubes and the test tube rack. Quite a simple item to create in Blender, but I started off easy to get me use to Blender, this will be the first item I make.


The second sketch I made was of the jar of eyeballs. This fits the theme of what I am going for of evil laboratory owned by a mad scientist. This will also test me on how glass texture works in Blender.


The third sketch I decided to do was of a horror/olden hospital bed to really give me a challenge if I get to this point and how hard it would be to add in all the detail.


Blender: Testing Out Different Materials reflection

I tried out lighting with concrete, so I tried it further with wood to see how it reacts with light. The wood I use was of a real door and I got the different version I used by using the Live Normal app, which is an application you can find in the Play Store and I believe the Apple digital store.

This is the final result with the images I used.

Wooden door light reflection.png
Final render

Tutorial: Adding Depth and lighting to Texture

Today I learned how to add in lighting and depth into a texture, to make it look more like a 3D environment.

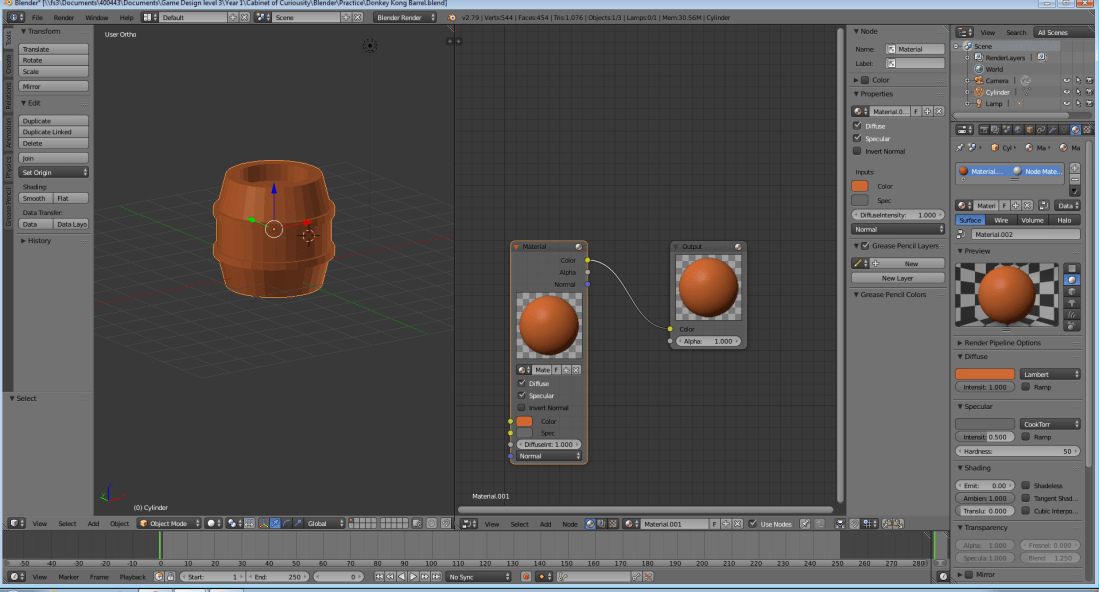
I first added in and enlarged a plane mesh, then opened up node editor in Cycle Render mode enabled nodes. I added in an Image texture, Diffuse, Glossy and a Mix Shader to combine the Diffuse and Glossy textures together, these are then connected to a Material Output.

concrete texture


Afterwards I added a sphere ball in the edge of the corner, lifting into the air slightly. This is using an Emission material at 15 strength.

I then re-opened the concrete node editor and added in two more image textures, one for the extra bumps and the other for lighting. The images used is the same image with different levels of light and dark. The image texture for bumps is changed to Non-Color-Data and connected to the bump height input, that is then connect to both Diffuse and Glossy Normal input and that connects out as previously.

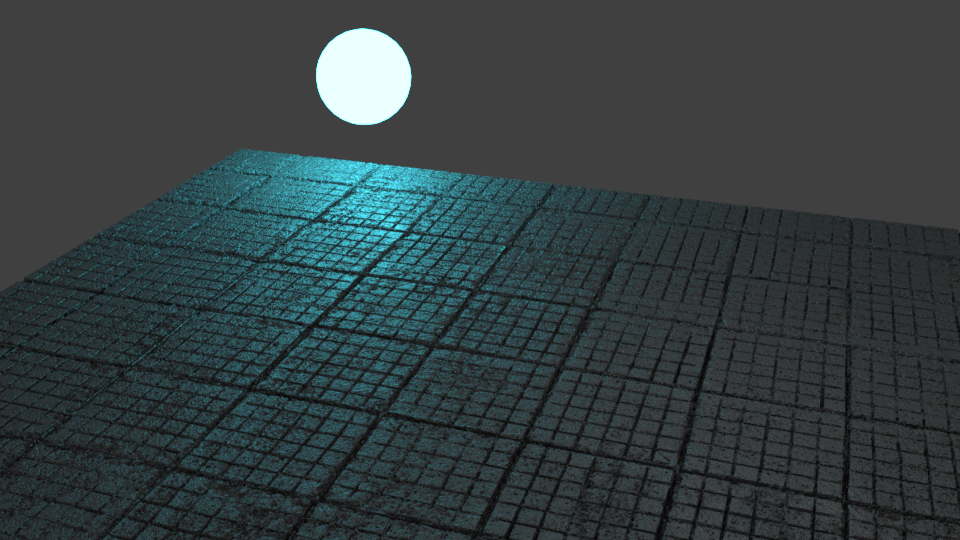
The image for lighting is changed to Non-Color-Data value and is connected into the Fac input value of the Mix Shader, which connects to the output, which creates this in rendered mode:

lighting concrete


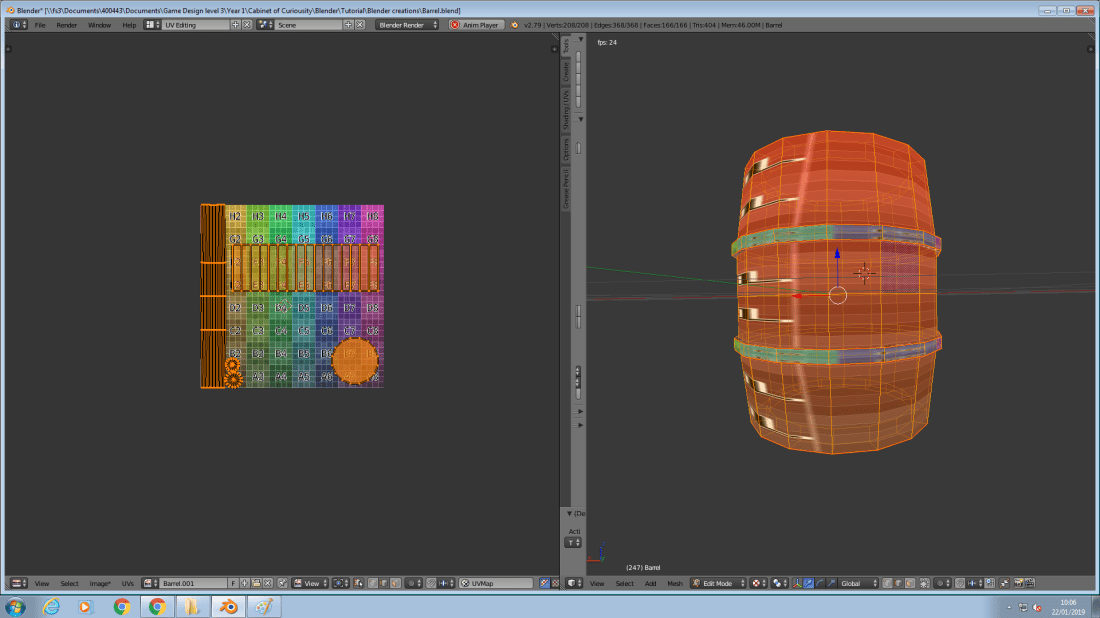
After this I learned how to do depth automatically. I selected the concrete and went to edit mode and used the Subdivide tool and inputted 100 cuts for the division. I then open up the modifier tool on the right and added 2 modifiers, Subdivide and Displace, I edited these to my situation. I then went into texture and clicked displace and added in a new image for the texture.

concrete depth


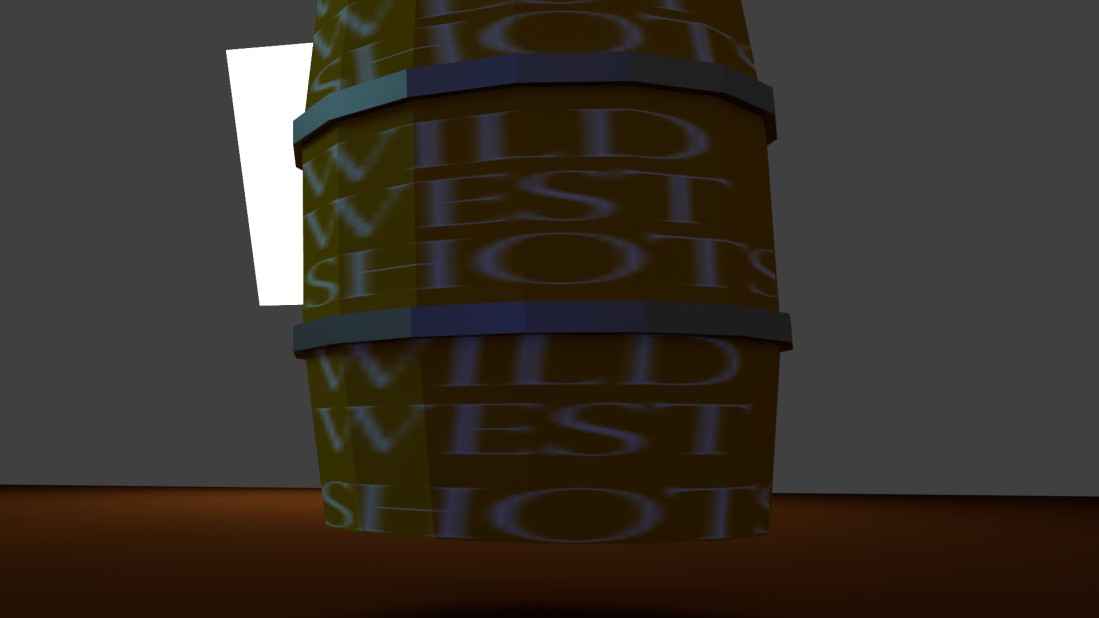
As you can see the quality increased, but that’s because, I reduce the strength. The strength as default value looks like this:

concrete depth overload.png


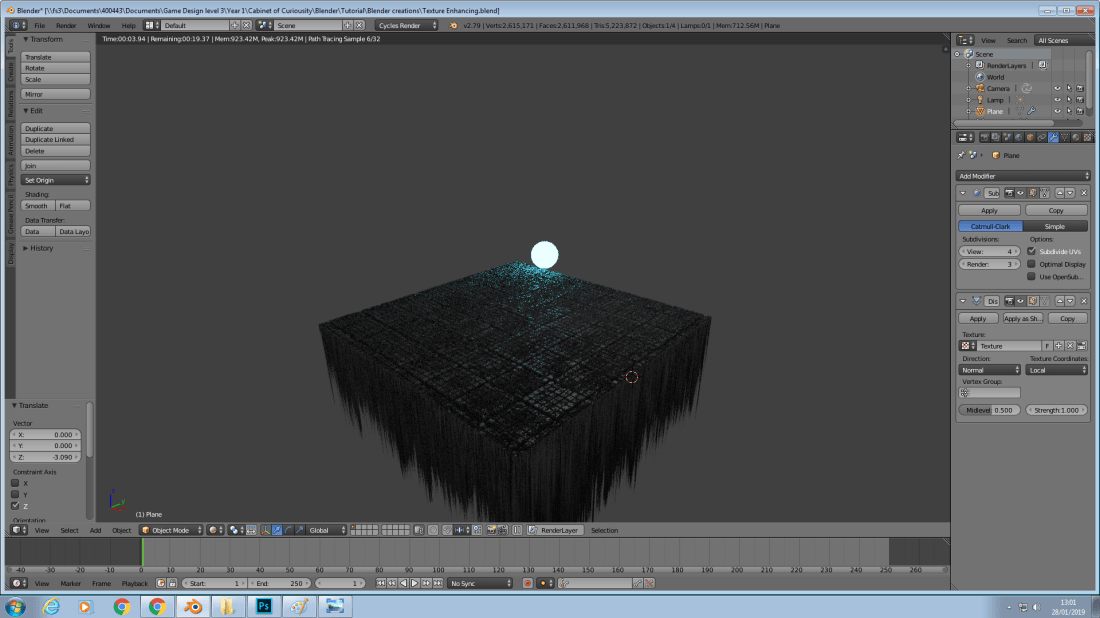
Yeah that’s not good, but that top though looks amazing. The final rendered image looks like this:

concrete and depth lighting

Tutorial: Barrel Rendering

To start the barrel rendering I needed to change the Blender mode to Cycle Render. This is done to make the rendering have higher quality and give me certain options.

I then opened the Node Editor, selected a material and clicked Use Nodes (forgot to take a screenshot, so recreated it):

node editor

I then added an Image Texture panel and inserted my UV texture image. Then I opened my barrel ring material and enabled nodes. I then added in a Glossy BSDF and combined the two with a Mix Shader node, so I could use them both for the surface material.

Afterwards I went to object mode and hid the node editor. I then added in planes and relocated them, behind, in front and the side of the barrel tilted and raised off the ground. I added and assigned an Emission material for the surface; this makes it glow.

I then went into render mode arranged the barrel and selected View –> Align View –> Align Active Camera to View, then adjusted the view and then clicked on the camera object, Render and then adjusted a few options and clicked Render, a little while later I had a rendered image:

rendered barrel

I did the last render quickly, because I was short on time and later on I was shown why a high sample rate is useful:

Blender Tutorial: Texturing

uv seen marking

Today I learned how to render a texture in Blender. I opened up the UV Editing mode, then selected the top and bottom rings of the barrel. I then marked the seams. I then selected an edge of the barrel and marked that to. I then unwrapped it with the UV menu with the U key.

I did this for the rings too, but turned off sync and then rearranged them to make sure they don’t overlap.

I then created a new image, removing alpha and changing the Generation Type to Color Grid.

color grid

I then went to the Rendering section in the Properties window and went to Bake, then I changed the bake mode to Ambient Occlusion to add in automatic shading and clicked bake. I then went back into the rendering file and saved the rendered barrel as a PNG file, modified it in Photoshop and overwrote the saved file and re-opened Blender. I then reloaded the image and got my rendered image.

Unfortunately the render didn’t turn out correctly, because I marked it incorrectly, but I will need to keep practicing that.

rendered texture

Blender: Barrel Workshop

This was the first look for me into edit mode.

I first started anew, deleted the light and cube, even though some light stayed. I then added in a cylinder. Went to ortho mode and switched to edit mode. I needed to switch to edit mode, because in object mode you can only edit the whole object and not individual parts. In edit mode you can edit each individual vertices and apply materials to each surface, vertices and edges colour.

When in edit mode I selected each vertex by right clicking on them with the correct selection tool of vertices select.

I selected all vertices with the A key and increased the Z axis scale. I then sub-dived the barrel with CTRL + R, press the 2 key once for the amount of Vertices I wanted to add and selected the area I wanted with left click. I then scaled this area slightly bigger.

subdived_box_select

I deselected the barrel and used the Box Select tool (B) and selected the vertices I wanted. This didn’t work completely, so I switched to wire frame mode to select all there and I also could select all the loops with Alt + R + Right click. Then I was shown how to extrude with the Extrude tool (E), but before that I scaled down the surface to add a wooden ring appearance to the top, extruded the top down and then mirrored the object, deleted the bottom half of the barrel and assigned the mirrored effect (Z axis only) through object mode. If I don’t assign it, it will continue to mirror the effect.

I placed another cylinder, edited it in edit mode to have a slight bigger width and much smaller height, I then moved this up to the top of the first ring of the barrel and duplicated and relocated it to the bottom ring. I then joined these together with CTRL + J.

After all the meshes were done, I added in colours and took a screenshot:
barrel with metal rings

Table Workshop Tutorial

To create the stool I reloaded a new file, created a cube, reduce it’s Z axis, and raised it up for the table.

I then added in a cylinder shape reduce the scale, then reduced the scale of the Z axis again, went into Ortho mode, change to front view, moved the leg to a corner, duplicated it and moved it to the right, then selected both and duplicated it again and moved them.

blender legs

I then smoothed the legs with the left window shading tool.

blender smooth legs

While going through the tutorial I learned how to resolve the file if this happens by user error.

crazy blender screens!